|
All care
has been given to present this pattern in the original form.
KnitHeaven
is not responsible for errors.
CHAPTER XIV.
NETTING.
EXPLANATION OF STITCHES.
Netting is another employment, to which the attention of the fair has
been directed from the remotest times. Specimens of Egyptian network,
performed three thousand years since, are still in existence; and, from
that time, the art, in connection with that of spinning flax, was there
carried to its highest state of perfection. With these specimens, are
preserved some of the needles anciently used in netting. They are to be
found in one of the museums at Berlin. The Egyptian nets were made of
flax, and were so fine and delicate, that according to Pliny, “they
could pass through a small ring, and a single person could carry a
sufficient number of them to surround a whole wood. Julius Lupus, while
governor of Egypt, had some of these nets, each string of which
consisted of one hundred and fifty threads.” But even this fineness was
far exceeded by the thread of a linen corslet, presented by Amasis, king
of Egypt, to the Rhodians, the threads of which, as we learn from the
same authority, were each composed of three hundred and sixty-five
fibres. Herodotus also mentions a corslet of a similar texture.
[126]In connection with other elegant female accomplishments, netting has
continued to claim the attention of the ladies of Europe, in every
advanced state of civilization, and, in the present day, is cultivated
with considerable success. Netting was a favorite employment of the late
Queen Charlotte, during the latter years of her life.

Plain Netting.—Take the mesh in the left hand, (having previously made
a long loop with twine, and fixed it to any convenient support,) between
the two first fingers and the thumb. The netting needle must be threaded
with the material, and fastened by a knot to the long loop before spoken
of, and the mesh must be held up as close as possible to this knot
under the twine. The silk is to be held in the right hand between the
fore finger and the thumb and must be passed under and around the left
hand, so that the material may be formed into a slack loop, passing over
all the fingers, except the little one. In this position, the silk must
be held between the upper side of the mesh and the left-hand thumb, and
the needle must be passed back, round the pin or mesh, allowing the
material to form a larger loop, so as to include the little finger. The
needle will thus be brought round, in front of the mesh, and must pass
under the first loop, between the mesh and the fingers, and thus through
the loop called the foundation loop, and thence over that portion of the
material which goes backward for the purpose of forming the second loop.
The needle must be kept in its position, till the right hand is so
brought round as to be able to pull it through, and then the needle
being drawn out and held in the right hand, the worker must disengage
all the fingers of the left except the last, which is to retain its hold
of the second loop, which[127] was formed by passing the material round it.
By means of this hold, retained by the little finger, the material is to
be drawn to the mesh, and the knot thus formed be drawn tight to the
foundation. This process is to be repeated, until a sufficient number of
stitches are formed as are necessary, according to the width of the net
desired. As the mesh is filled, some of the loops must be suffered to
drop off; and when the row is completed, it must be drawn out, and a row
of loops will be found suspended from the foundation by their respective
knots, and moving freely onwards. The work is then to be turned over,
which will cause the ends of the rows to be reversed; and in netting a
second row, it will be done as before from left to right. In commencing
the second, and all the succeeding rows, the mesh must be so placed as
to come up close to the bottom of the preceding row or loops, and the
former process with the needle must be repeated. It will be needful, to
have a sufficient quantity of material always wound on the needle, or
otherwise it will not move freely round, as it is indispensible it
should do.
Bead Stitch.—To execute this stitch properly, requires care, but it is
very ornamental. Beads of all kinds, may be introduced. In order to net
with beads, you must procure a long taper darning needle: the stitch is
as follows; string a bead upon the thread or silk you net with: this
bead is to be brought to the front of the mesh, and held there until the
knot is made; at the back of the mesh, bring the needle and thread,
passing the point through the bead which is upon the front of the mesh.
The needle and thread are then to be drawn through it, by which means
the bead will be brought quite up to the knot just made. By working the
beads in this manner, they will be kept stationary upon the thread, and
so remain in their places, and impart much beauty to the work.
[128]
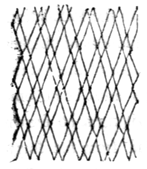
Diamond Netting.—This kind of netting is easy of execution, and looks
extremely pretty. It is done by making every other stitch a loop stitch,
in order to effect which, the silk must be put twice round the mesh,
instead of once, as in plain netting. Treble diamond netting is similar,
only the process is rather more difficult in execution. After netting
three rows plain, at the beginning, the first row is to be composed of
one loop stitch, and three plain stitches, repeated until the row is
finished: then in working the second row, commence with a plain stitch,
then follow with a loop, then two plain stitches, and repeat as before.
For the third row begin with one or two plain stitches, make a loop,
then net a stitch plain, and repeat the two loops and the plain stitch
to the end of the row. For the fourth row you net three stitches in
plain netting, then make a loop stitch, and repeat as in previous rows.
An attention to this arrangement, will soon enable the young student in
net-work, to net in as many stitches as may seem desirable.

Diamond Netting, of Five Stitches.—Commence with a long loop, then net
five loops plain, repeat to the end of the row, finishing with a long
loop. Second row, begin with a plain loop, make a loose stitch to meet
the short loop in the previous row, and withdraw the mesh before
commencing the next loop, work four loops plain, and so proceed. Third
row is commenced as the second: withdraw the mesh as before, and work
three plain loops. Begin the fourth[129] row with a plain stitch, work a
long loop, then a loose stitch; withdraw the mesh, and work two plain
stitches; again withdraw the mesh, work a plain stitch, and so proceed
to the end. The fifth is begun with two plain stitches; then form a
loose stitch, withdraw the mesh, work one plain loop, again withdraw the
mesh, and finish with two plain stitches. The sixth row commences with
three stitches plain, then make one loose stitch, and finish with two
plain ones. For the seventh row, commence as in the last case; make a
long loop, and finish with two plain stitches. The eighth row begins
with three stitches in plain netting; withdraw the mesh, net one stitch
plain, make a loose stitch, again withdraw the mesh, and finish the row
with a plain stitch. In doing the ninth row net two stitches plain,
withdraw the mesh, net two more plain stitches, make a loose stitch,
again withdraw the mesh, and finish with a plain stitch. The tenth row
is begun as the last, but instead of the loose stitch, net a plain one,
then make the loose stitch, and withdraw the mesh. The mesh proper for
this kind of netting is No. 18, and the silk called second-sized purse
twist, is the best adapted for this kind of work.
Dotted Netting.—This is easily done. Cast on the number of loops you
require, and proceed as follows. Begin with long loop, in which you next
increase two stitches; repeat to the end of the row. None of the rows
are at all varied; and you must carefully preserve its uniform
appearance, as in that consists its principal beauty.
Shaded Silk Netting.—This is beautiful, when the shades blend well
together. Of course, each row must be worked in one shade, and the next
needful must be matched with the utmost care.[130] It is not possible to
give minute rules on such a subject: but, in this, as in other things,
practice will insure success.
Grecian Netting.—This is beautiful, and should be worked with fine
silk, and with two meshes, No. 9 and 18; one plain row is to be netted
with the large mesh, and then in the next row employ the small one. The
silk is twisted round the fingers as in plain netting, and the needle
must pass through the finger loop into the first stitch, and thence into
the second. Then let the second be drawn through the first, and the
first through the second, finishing the stitch by releasing your fingers
and pulling the material tight. The succeeding stitch is a small loop,
that appears to cross the stitches twisted together. These three kinds
of stitches form the pattern, and are to be repeated until the work is
completed. Grecian netting may be employed for a variety of purposes,
and you can, of course, vary both the material and the meshes as best
accords with the design you are intending to accomplish.
French Ground Net.—You must have an even number of loops on the
foundation, then proceed. First row, plain stitches and long loops,
alternately; second row plain; make a loose stitch, and repeat. Begin
the fourth with a loose stitch, net one plain, repeat to the end;
commence the fifth row by netting one plain loop, make a long loop, and
the little loop as in the third row; in coming after the last long loop,
the little loop must be exchanged for a plain stitch.
Another kind of Honeycomb Netting.—Use a mesh No. 17, and set on an
even number of stitches. Net the first row plain, having the silk round
the mesh twice. For the second row you[131] put the silk once round the mesh
and net the second loop, having previously half twisted it. Then net the
first loop plain, net the fourth as the second, again net a stitch
plain, and thus proceed with plain and half-twisted stitches,
alternately. The third row is the same as the first, and the fourth as
the second. These kinds of netting are very pretty for purses, bags,
&c., and may be done in different colors if the purse is worked in four
or five rows of plain, and the same number of honeycomb netting.
Honeycomb Netting.—You are to make an even number of loops, putting the
silk twice round a No. 18 mesh, for the second row net with the silk
once round the mesh, and put the first stitch through the second at the
back, and net it; then the second stitch is pulled through the middle of
the first and netted: you do the same with each two of the other
stitches, and must be careful not to burst them. For the third row, the
silk is put twice round the mesh, and the netting is plain. You proceed
thus in alternate rows until the work is done.
Honeycomb Netting, with two Meshes.—The meshes proper are No. 9 and 16.
Cast on an even number of stitches, and net the first row plain, with
the No. 9 mesh. With mesh No. 16 net the second row, working the second
stitch first and the first second, and so proceed netting the fourth
stitch, and then the third, and so on to the end. Work the third row
with No. 9 as before, and the fourth row as the second, only netting the
first loop plain, and then taking, first the third, and then the second,
and so on to the[132] end, finishing with a loop in plain netting. The next
row is done plain with No. 9, the next with No. 16, exactly as the first
twisted row. The odd stitch netted plain, only occurs at the
commencement of each alternate row of netting done with No. 16. This
kind of netting is proper for a veil.

Leaf Netting.—This is pretty when executed properly. You should work
with cotton, and No. 14 mesh. Five loops are required for each pattern.
Commence the first row by netting two plain loops for the edge, then net
three plain, in the next loop increase four, and repeat this operation
to the end of the row; finish with two plain loops. Begin the second row
as before, and collect all the loops increased in each of the twice four
loops formed in the last row, into one; then net four loops plain;
repeat this to the end of the row, and net two plain as before. The
third row is plain netting. The fourth row has two loops netted plain,
then two more plain; you then increase four on each of the next two
loops, net one plain, and repeat the operation to the end of the row;
finish by netting two stitches plain. Fifth row, commence as before, net
one plain loop, collect the increased loops as the second row, net three
plain, and so repeat; net two plain to finish the row. The next row is
netted plain. Repeat these rows as often as your work requires it to be
done.
Net with Points.—This is done by making a foundation of, say, ninety
stitches. Net on this foundation with any color you please. Net fifty
stitches and return back again, proceed as before, only decreasing ten
stitches, and so go on, until the required point is gained. Two colors
are required.
[133]
Maltese Netting, in Spots.—This is neat and elegant: it is done as
follows. The first two rows are netted plain: you commence the third row
by netting seven stitches; the silk is then to be passed round the mesh,
and the needle brought under the knot in the second row, but without
netting it; that is between the stitch you last netted and the one you
are about to net. A loop is then made, which is not to be netted
separately, as that would increase a stitch in the next row; but it is
to be taken up with the last of the seven stitches previously netted. If
you desire the spots to appear very distinct and prominent, let the silk
pass twice round the mesh, and afterwards through the loop, and repeat
the operation to the end. You may do this spotting, either as it appears
in the pattern, or in almost any form you please.
Plain Open Netting.—This is pretty, and easy of execution. The
operation is performed by netting three rows plain, then a row of loop
stitches, then three rows plain, and a row of loops as before. You may
net to any length you please. The direction here given is all that is
necessary, and if duly attended to will enable any young lady to attain
proficiency.
Round Netting.—You commence making the loops, as in common netting, by
twisting the silk round the fingers, then pass the needle and the silk
through the finger-loop, and bring it up on the back side of the mesh,
between it and the fore finger; the fingers and loop are still to be
kept on them[134] as before; the middle is then to be reversed, and brought
down through the first loop, (on the foundation,) and taking a slanting
direction over the mesh. Having drawn it entirely through, you withdraw
your finger from the loop, as in ordinary netting. You every succeeding
loop in the same way.
Please
do not post this pattern to another website. However, Please feel free
to post a link to this page:
http://www.knitheaven.com/vintagepatterns/lwtb_CHAPTER_XIV.htm |